Practitioner groups
Note: The actions described in this lesson require a Manager permission on your clinic, and an active PMS subscription.
What are practitioner groups?
Practitioner groups let you divide the practitioners in your clinic into named subsets, and control exactly which data each person can access.
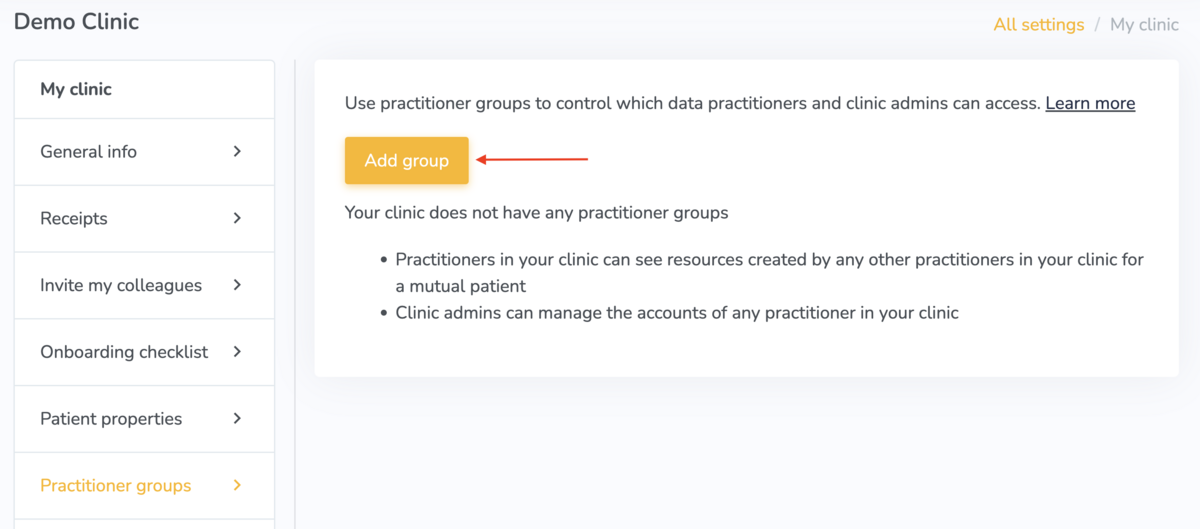
Without any practitioner groups, your clinic operates with open access:
- Practitioners can see patient resources (charts, meeting notes, invoices, etc.) created by any other practitioner in your clinic for a mutual patient.
- Clinic admins can manage the accounts of any practitioner in your clinic.
Once you create at least one practitioner group, access becomes restricted based on group membership:
- Practitioners can only see patient resources created by other practitioners in their same group(s) — even if other practitioners share that patient.
- Clinic admins assigned to a group can only manage the accounts of practitioners in that group. A clinic admin who is not assigned to any group can still manage all practitioners.
How to create and manage practitioner groups
To navigate to practitioner groups:
- Go to Settings in the top navigation.
- Under My Clinic, select Practitioner groups.
- Click Add group.
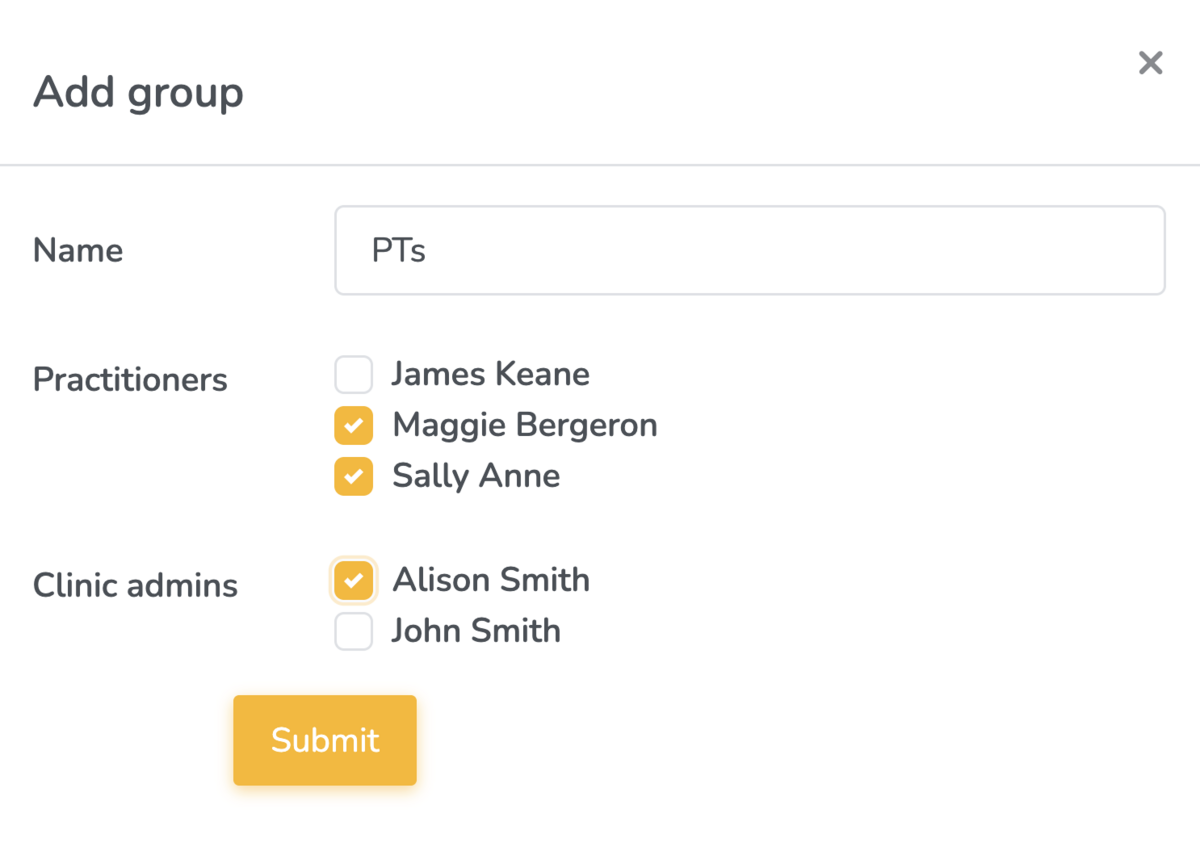
To create a group:
- Enter a Group name.
- Select the practitioners you want to include in this group.
- Optionally, select one or more clinic admins to assign to this group. Assigned clinic admins will only be able to manage the accounts of practitioners within this group.
- Click Submit.
To edit an existing group, click the edit (pencil) icon next to the group. You can rename it and add or remove practitioners and clinic admins at any time.
To delete a group, click the delete (trash) icon next to the group. Deleting a group removes all access restrictions it enforced for its members.
Note: A practitioner or clinic admin can belong to more than one group. Their access is the union of all groups they belong to.
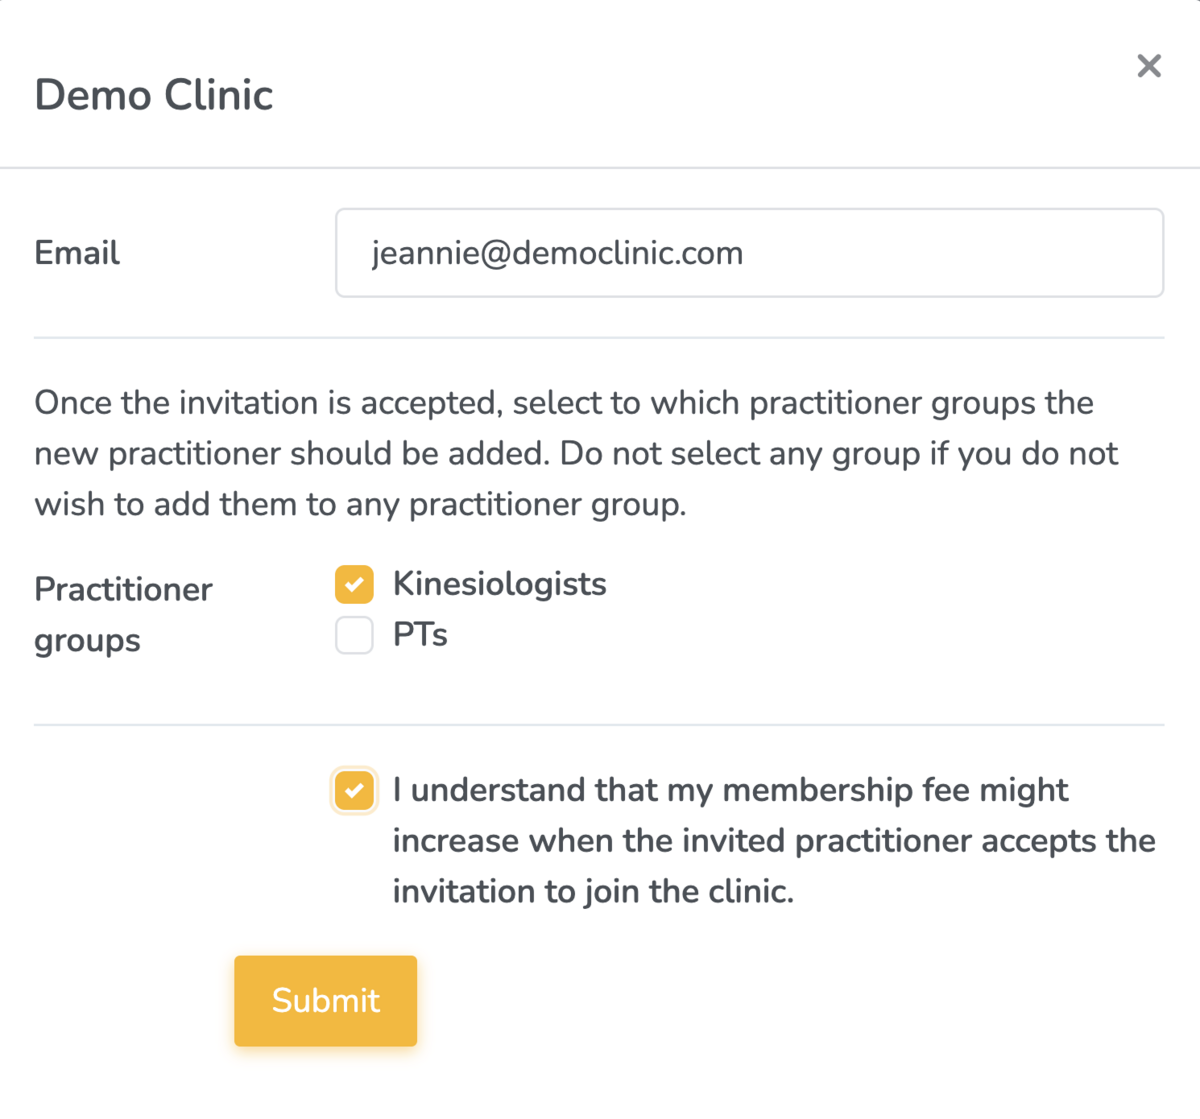
Assigning a new practitioner to a group via invitation
When you invite a new practitioner to your clinic, you can assign them to one or more groups directly in the invitation. Their group membership will be set automatically when they accept the invitation.
- Go to Settings > Invite my colleagues and create an invitation.
- If your clinic has at least one practitioner group, you will see a Practitioner groups section in the invitation form.
- Check the groups you want the new practitioner to join upon accepting the invitation. Leave all groups unchecked if you do not want to add them to any group.
- Send the invitation. Once accepted, the practitioner is automatically added to the selected groups.
Testing your practitioner groups
Use the built-in testing tool on the Practitioner groups page to verify your configuration before it affects live data.
To test a practitioner's access:
- On the Practitioner groups page, find the Test your practitioner groups panel.
- Select a practitioner from the dropdown.
- Click Test. The result will show which practitioners' patient resources the selected practitioner can access. If they share a patient with someone outside their group, those resources will not be visible to them.
To test a clinic admin's access:
- Select a clinic admin from the dropdown in the same panel.
- Click Test. The result will show which practitioners' accounts the selected clinic admin can manage.
Tip: Run a test after any change to your groups to confirm the access is set up the way you expect.